For the past two weeks, the finish carpenter, painter, and flooring installers have been hard at work adding the interior finishes we've selected. It is really satisfying to see the finishes installed. The flooring is near and dear to our hearts so we'd love to share some information about the installation products and techniques.
Even if reading about tile installation technique is not your jam, we hope to convey the layered and detailed nature of tile installation. These installers are true professionals and we're so proud of their work!

To keep our toes warm in the bathroom, we're installing the Schluter Ditra Heat for both bathroom floors. Here is a picture of the Ditra Heat Mat installation. The orange mat has to be mortared down to the 3/4" subfloor using a polymer modified mortar.

Making sure to get good adherence is important so the installers roll it with 100lb roller and then go along the edges with a grout float to make sure it is securely in the mortar.

One of the cool things about the Schluter Ditra Heat system is that the resistance wire (aka: heat source) clips right into the mat. Even cooler is that the spacing is set by the mat making it easy peasy to space properly. Three rows apart just like the picture. The cable gets tested before and after installation to make sure that it is still in top shape and wasn't damaged during the installation process.

Because we weren't immediately installing the tile, the installers back buttered the entire floor with mortar to protect the cable and make it easier to snap lines for the actual tile installation. This is the blank canvas for the installer to plan out the tile pattern.
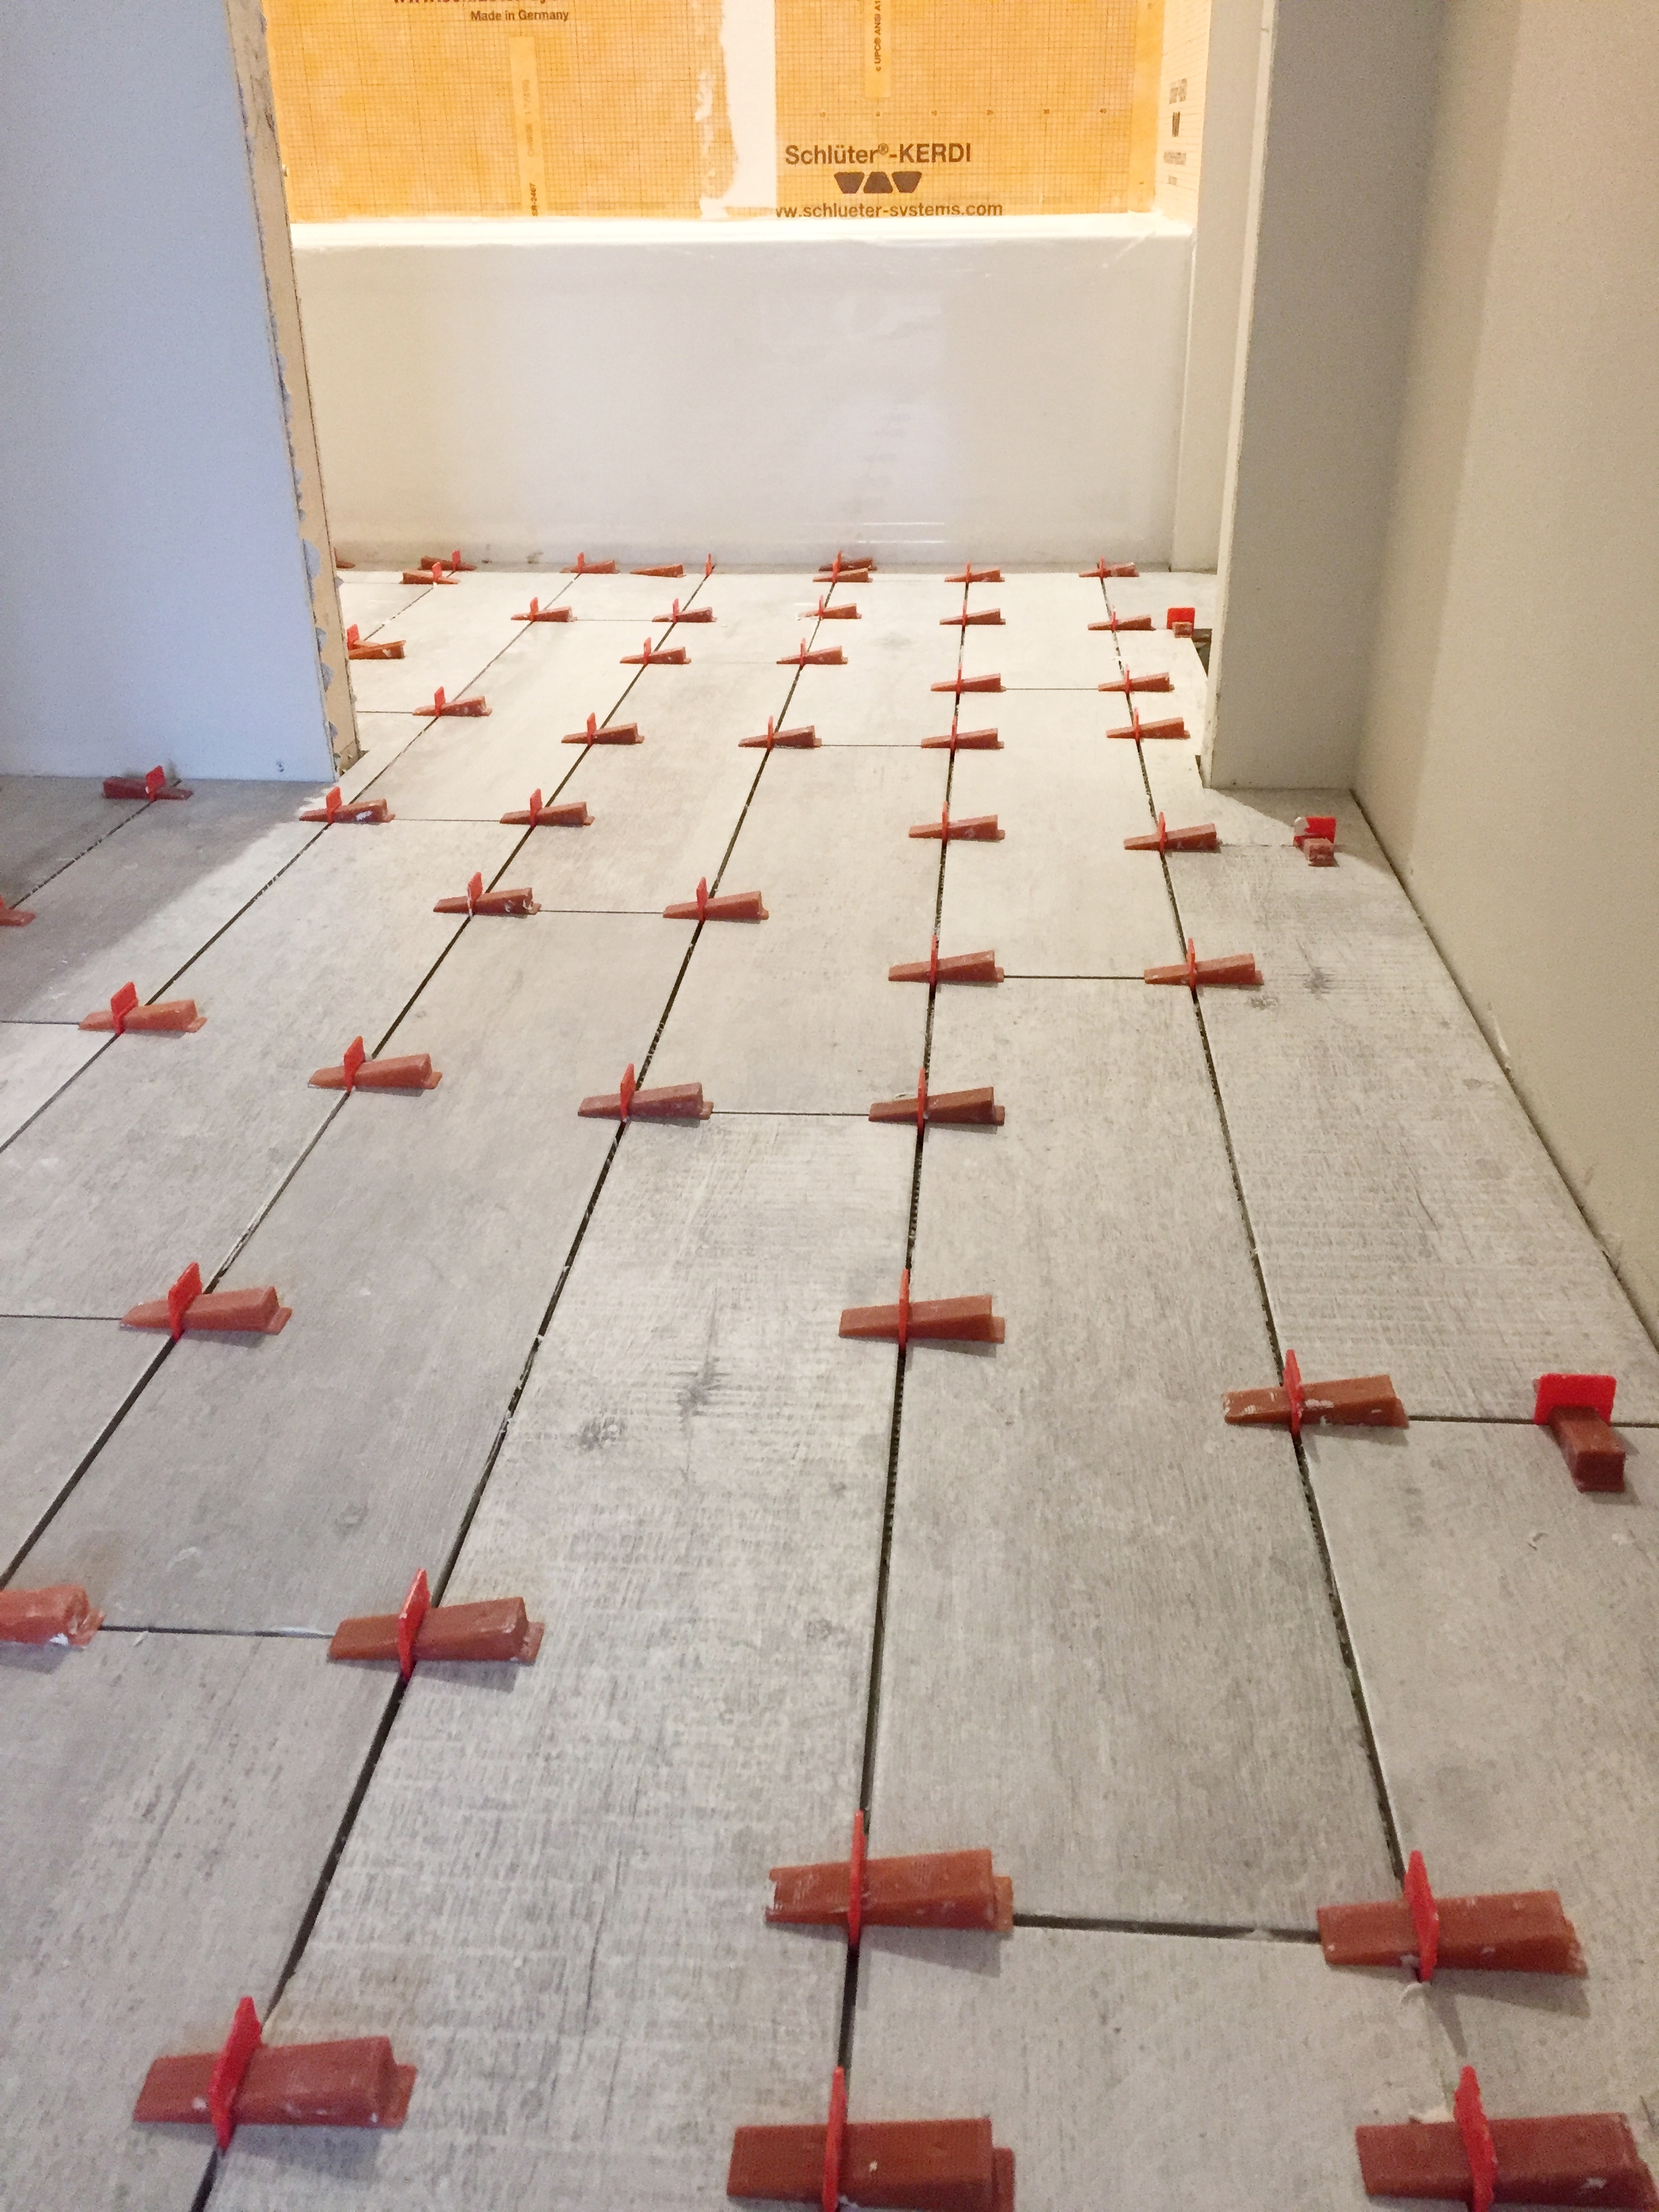
This picture shows a very important tool our tile installers use. Believe it or not, tile is not flat and is not always square either. These orange wedges and clips are a tile leveling system by Raimondi Industries. This system helps make installations as perfect as possible by maintaining spacing between tiles and bending the tiles to make the floor as flat as possible. Extremely cool technology that has been developed to accommodate installations with plank and large format tiles.

After the mortar dries, the wedges are broken off which breaks the clip at the bottom of the tile and leaves a perfect line for grouting.
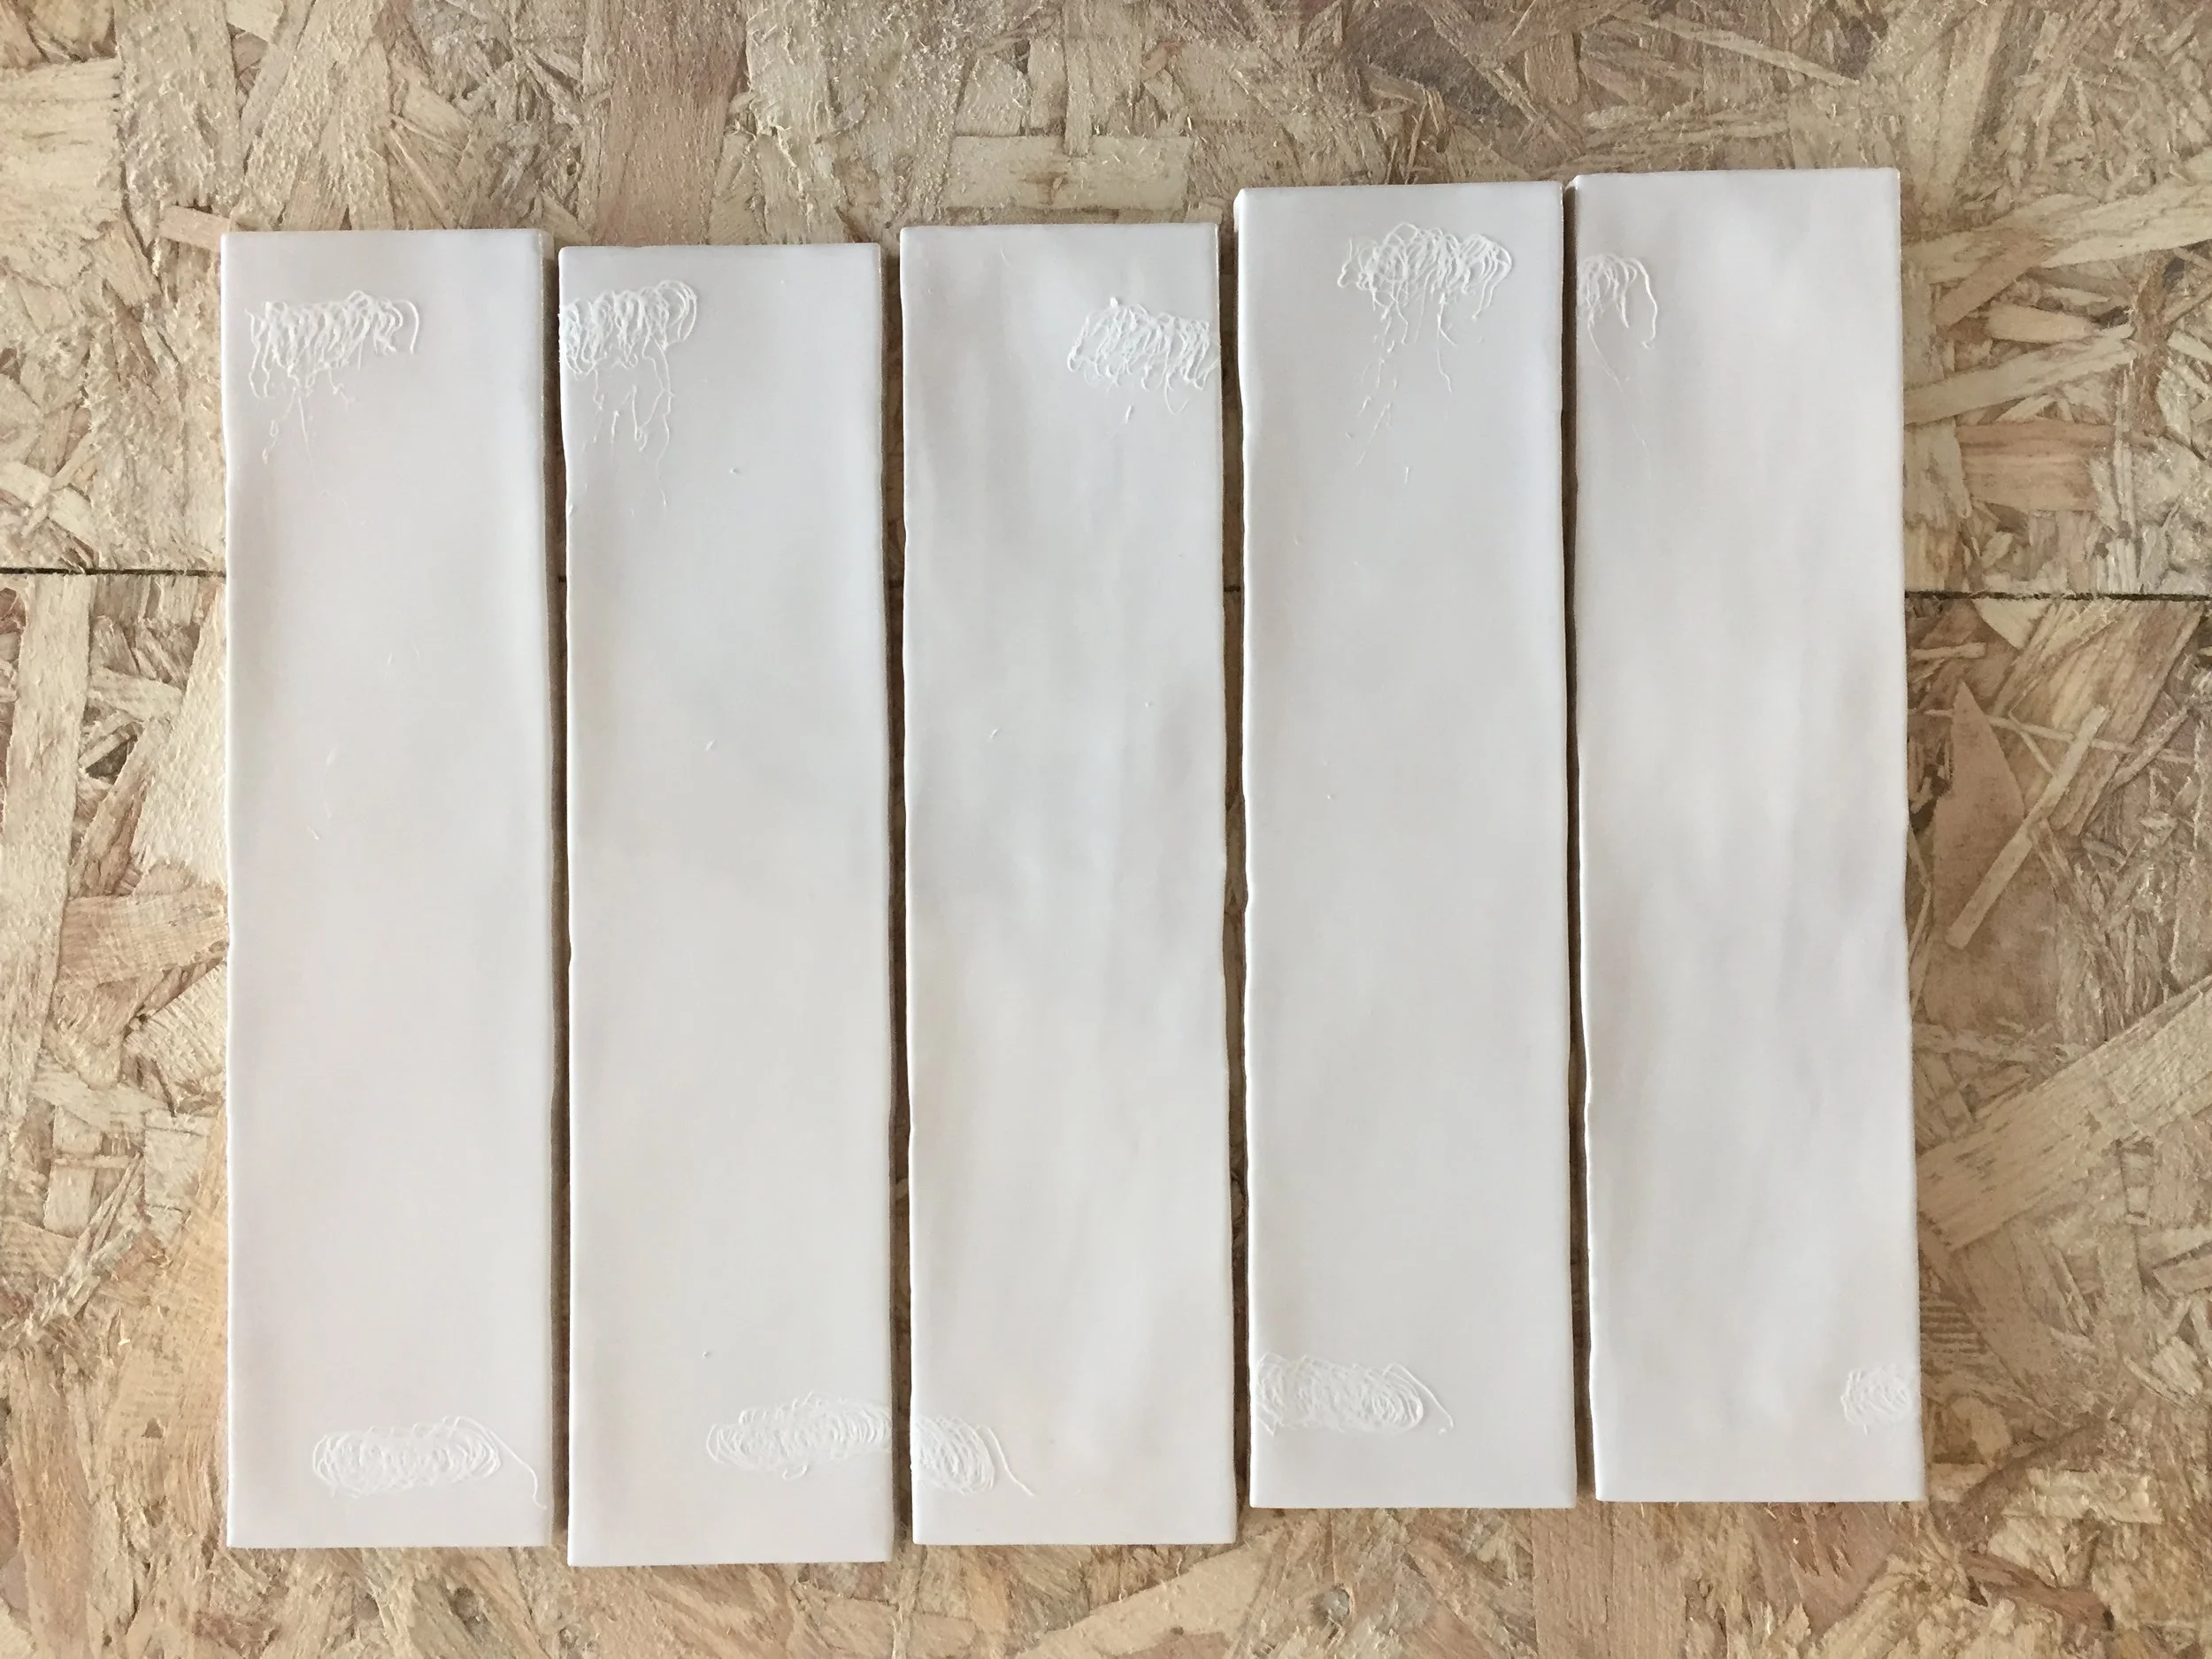
This is the wall tile we selected for around the tub. It is called Artigiano from Dal Tile. It's an extremely beautiful tile that can be used on walls. Notice the jagged edge giving the appearance of a handmade fire kilned tile. The tile surface is not flat which adds some additional interest.
Before installation the installer met with us to discuss the tile spacing. He pointed out that because of the irregularity, you can stack these tiles on top of each other.
The tile installer also pointed out that the bullnose (piece on the end with a rounded edge) could line up with two rows of tile if stacked on top of each other. We like things to line up whenever possible. We very much appreciated his input!
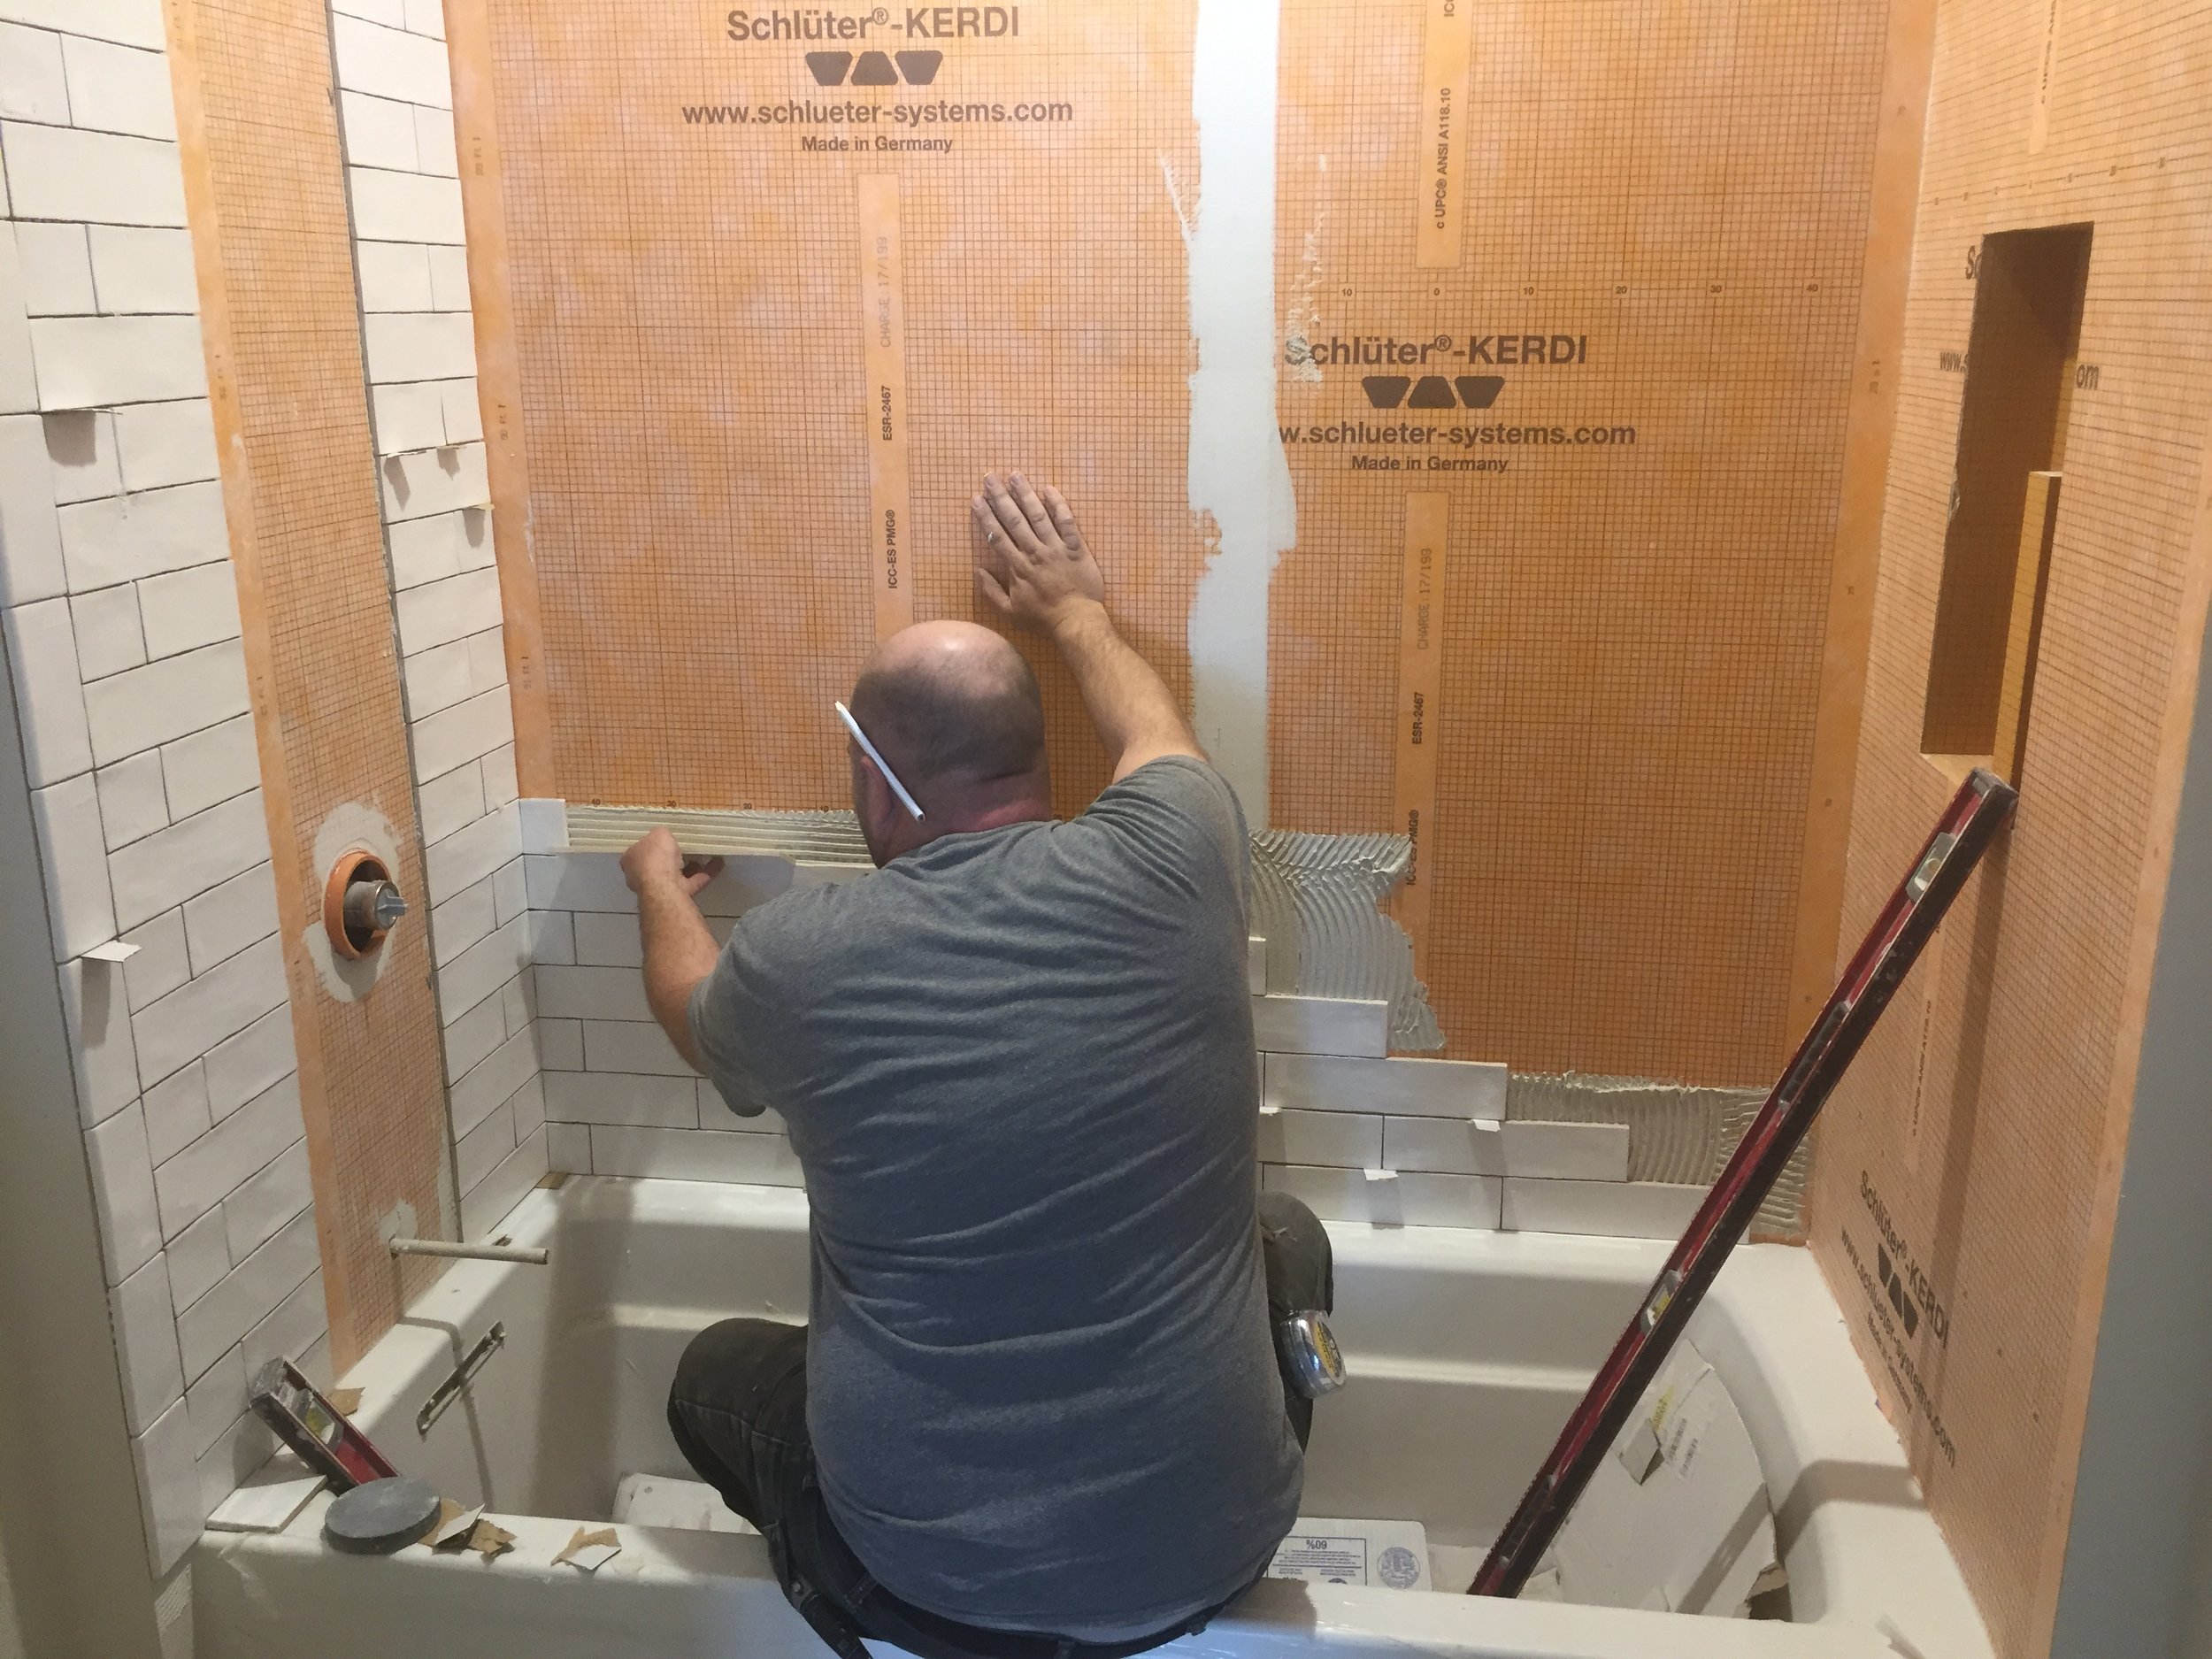
Notice on the walls behind our installer is more orange product from Schluter. That product is Kerdi and it is designed to water proof the wall so that no water ever penetrates the tub surround. We are using it in our custom shower as well. The Kerdi system by Schluter provides niches like the one on the right wall to hold shampoo and soap. It also offers benches and other products that you would want in water proof in a custom shower.

Oh my, do we LOVE this tile! Even surrounded by the in-progress mess - it shines bright! Go to our Shop Our House page to learn more about the products we're using in this bathroom and check back to see more progress.