#22 Solid Gold - Coordinating finishes

It's true, brass is back.

You might be thinking..."but I just got rid of the shiny brass in my house!" As with most trends, this resurgence is being done differently. A more matte finish with more modern lines is what we're seeing this time around. Honestly, I am loving it. It's such a beautiful compliment to grey and it adds a touch of warmth to any room. 

home in the heartland kitchen brass.JPG

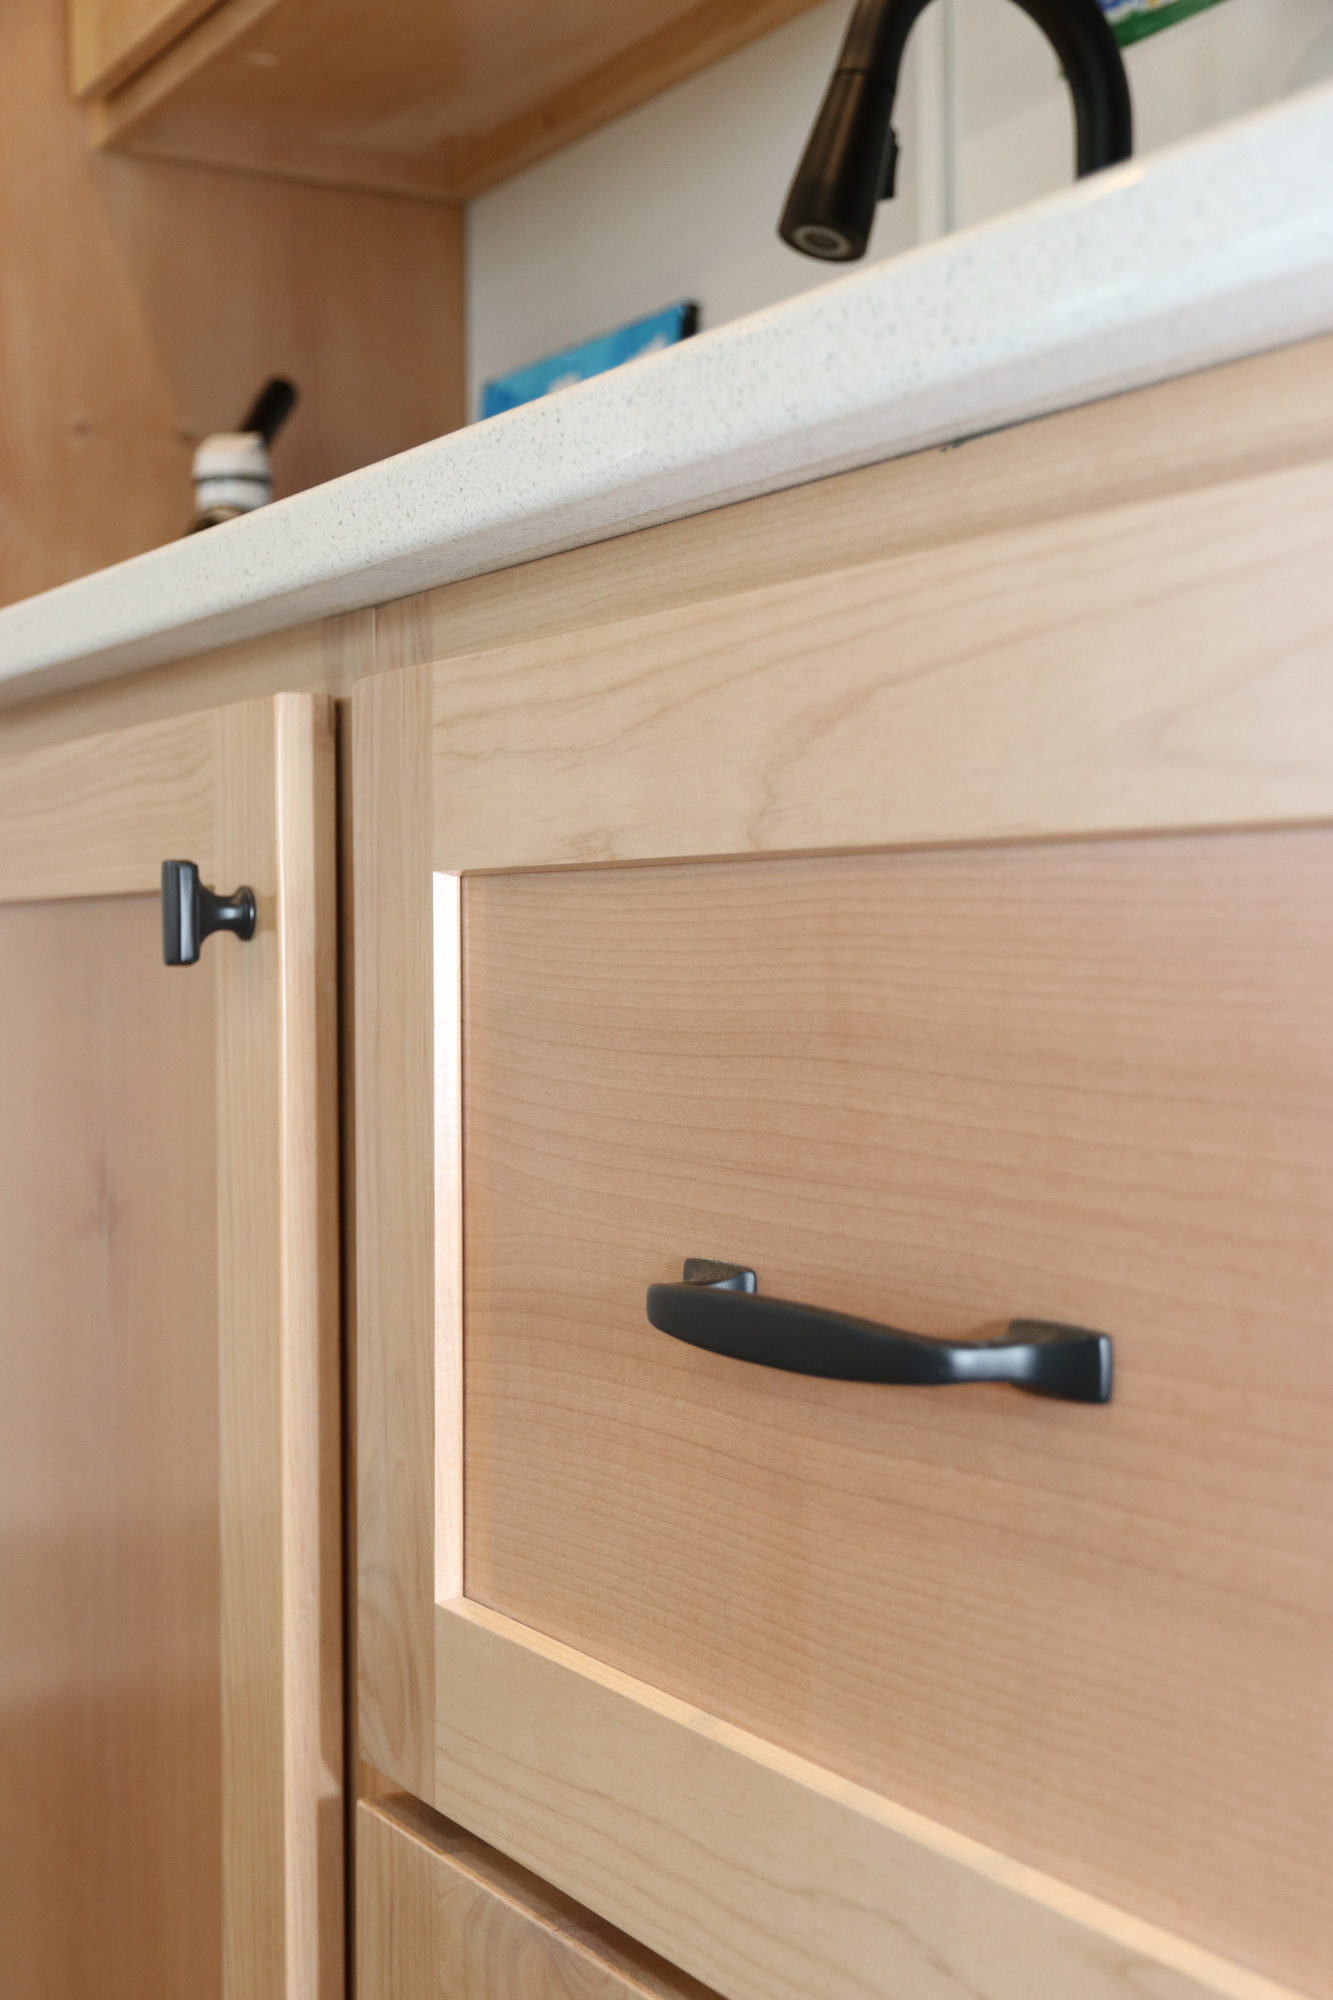
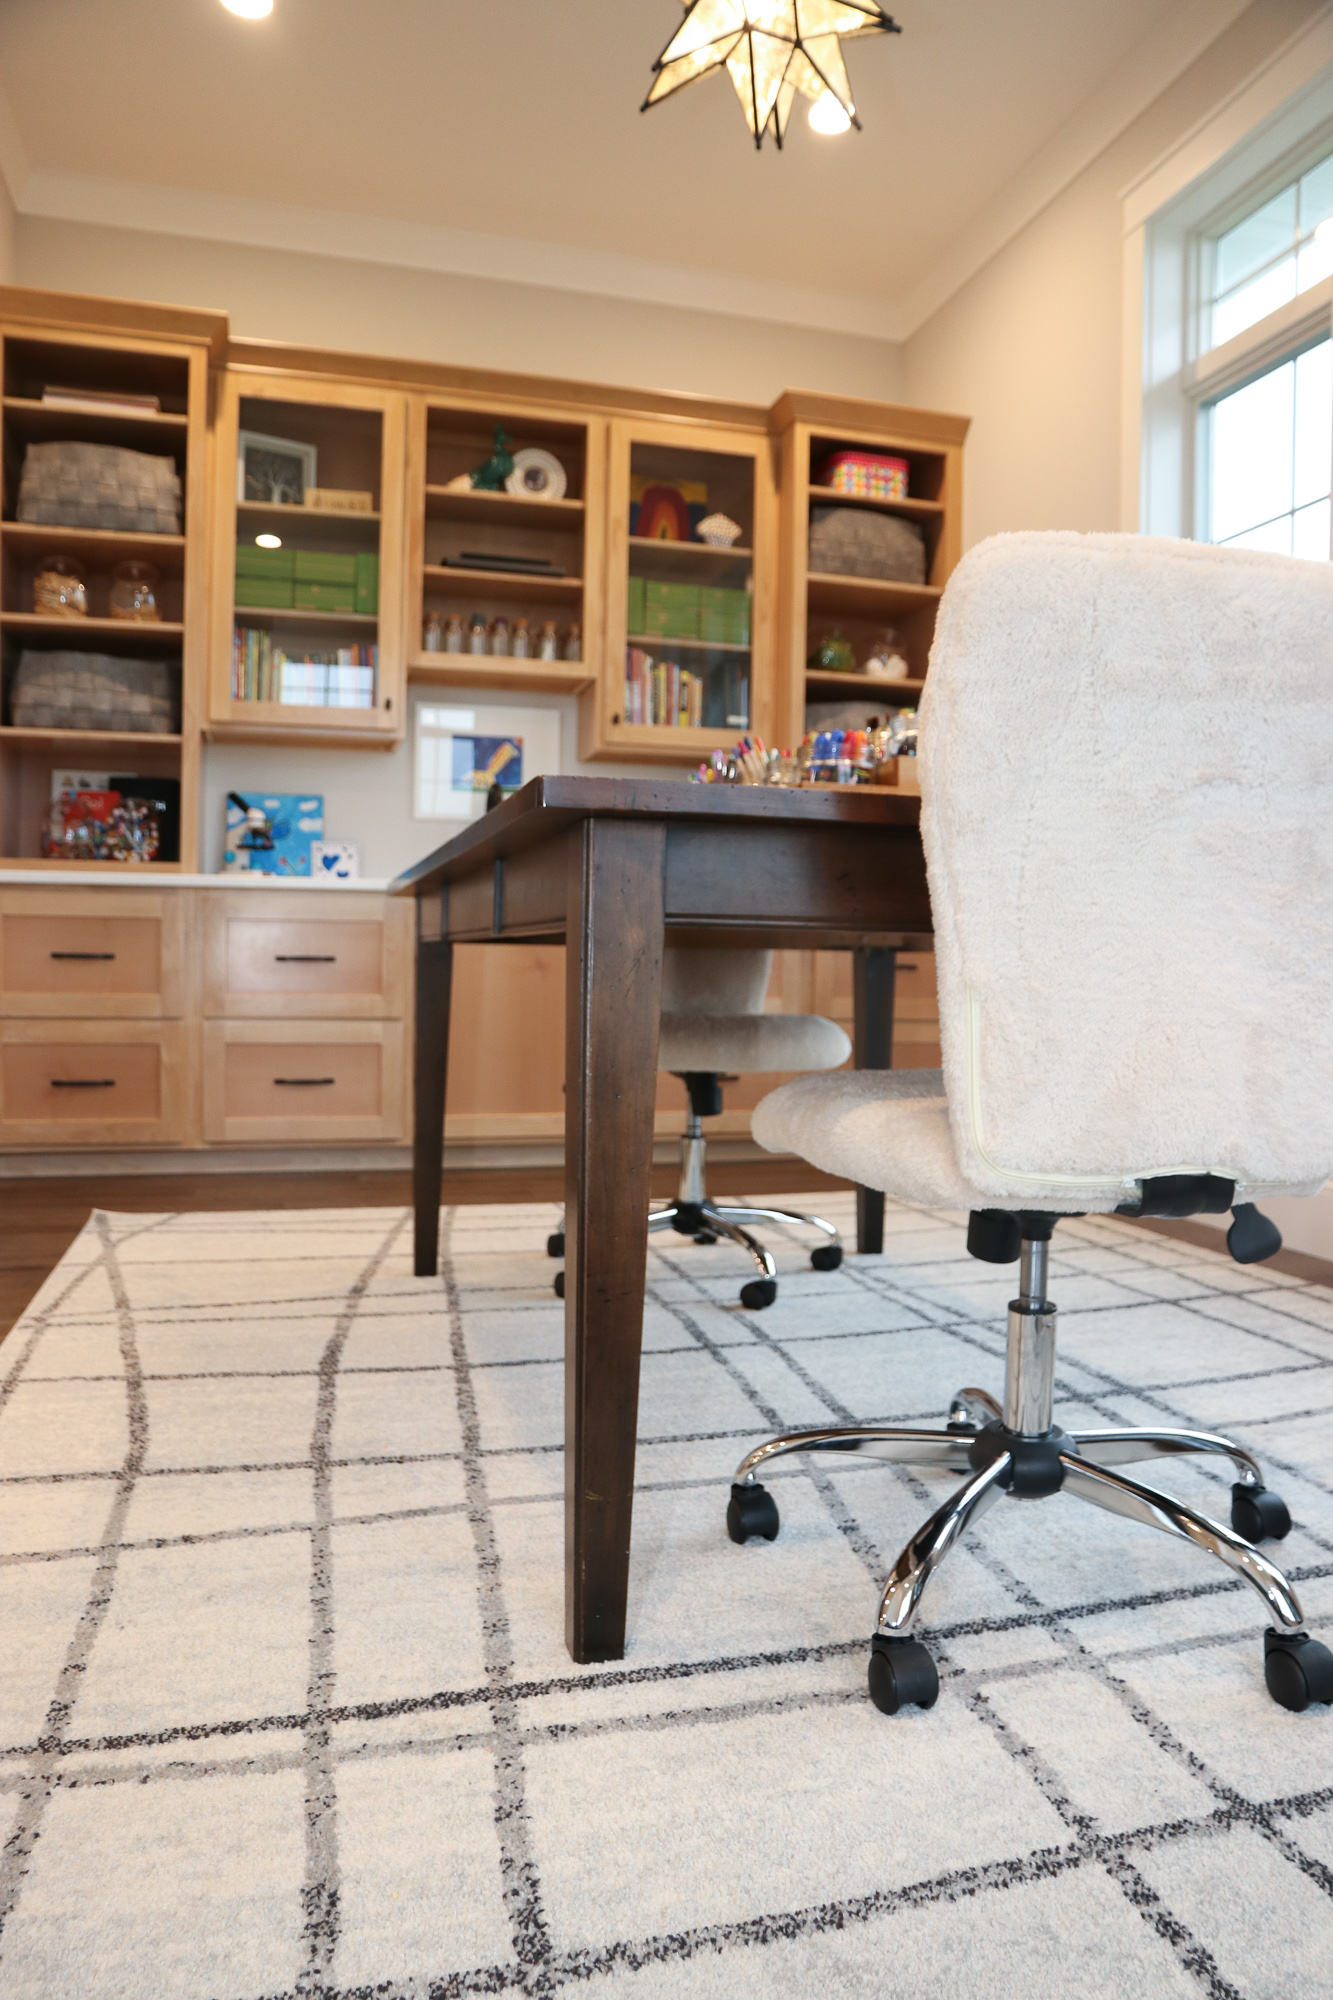
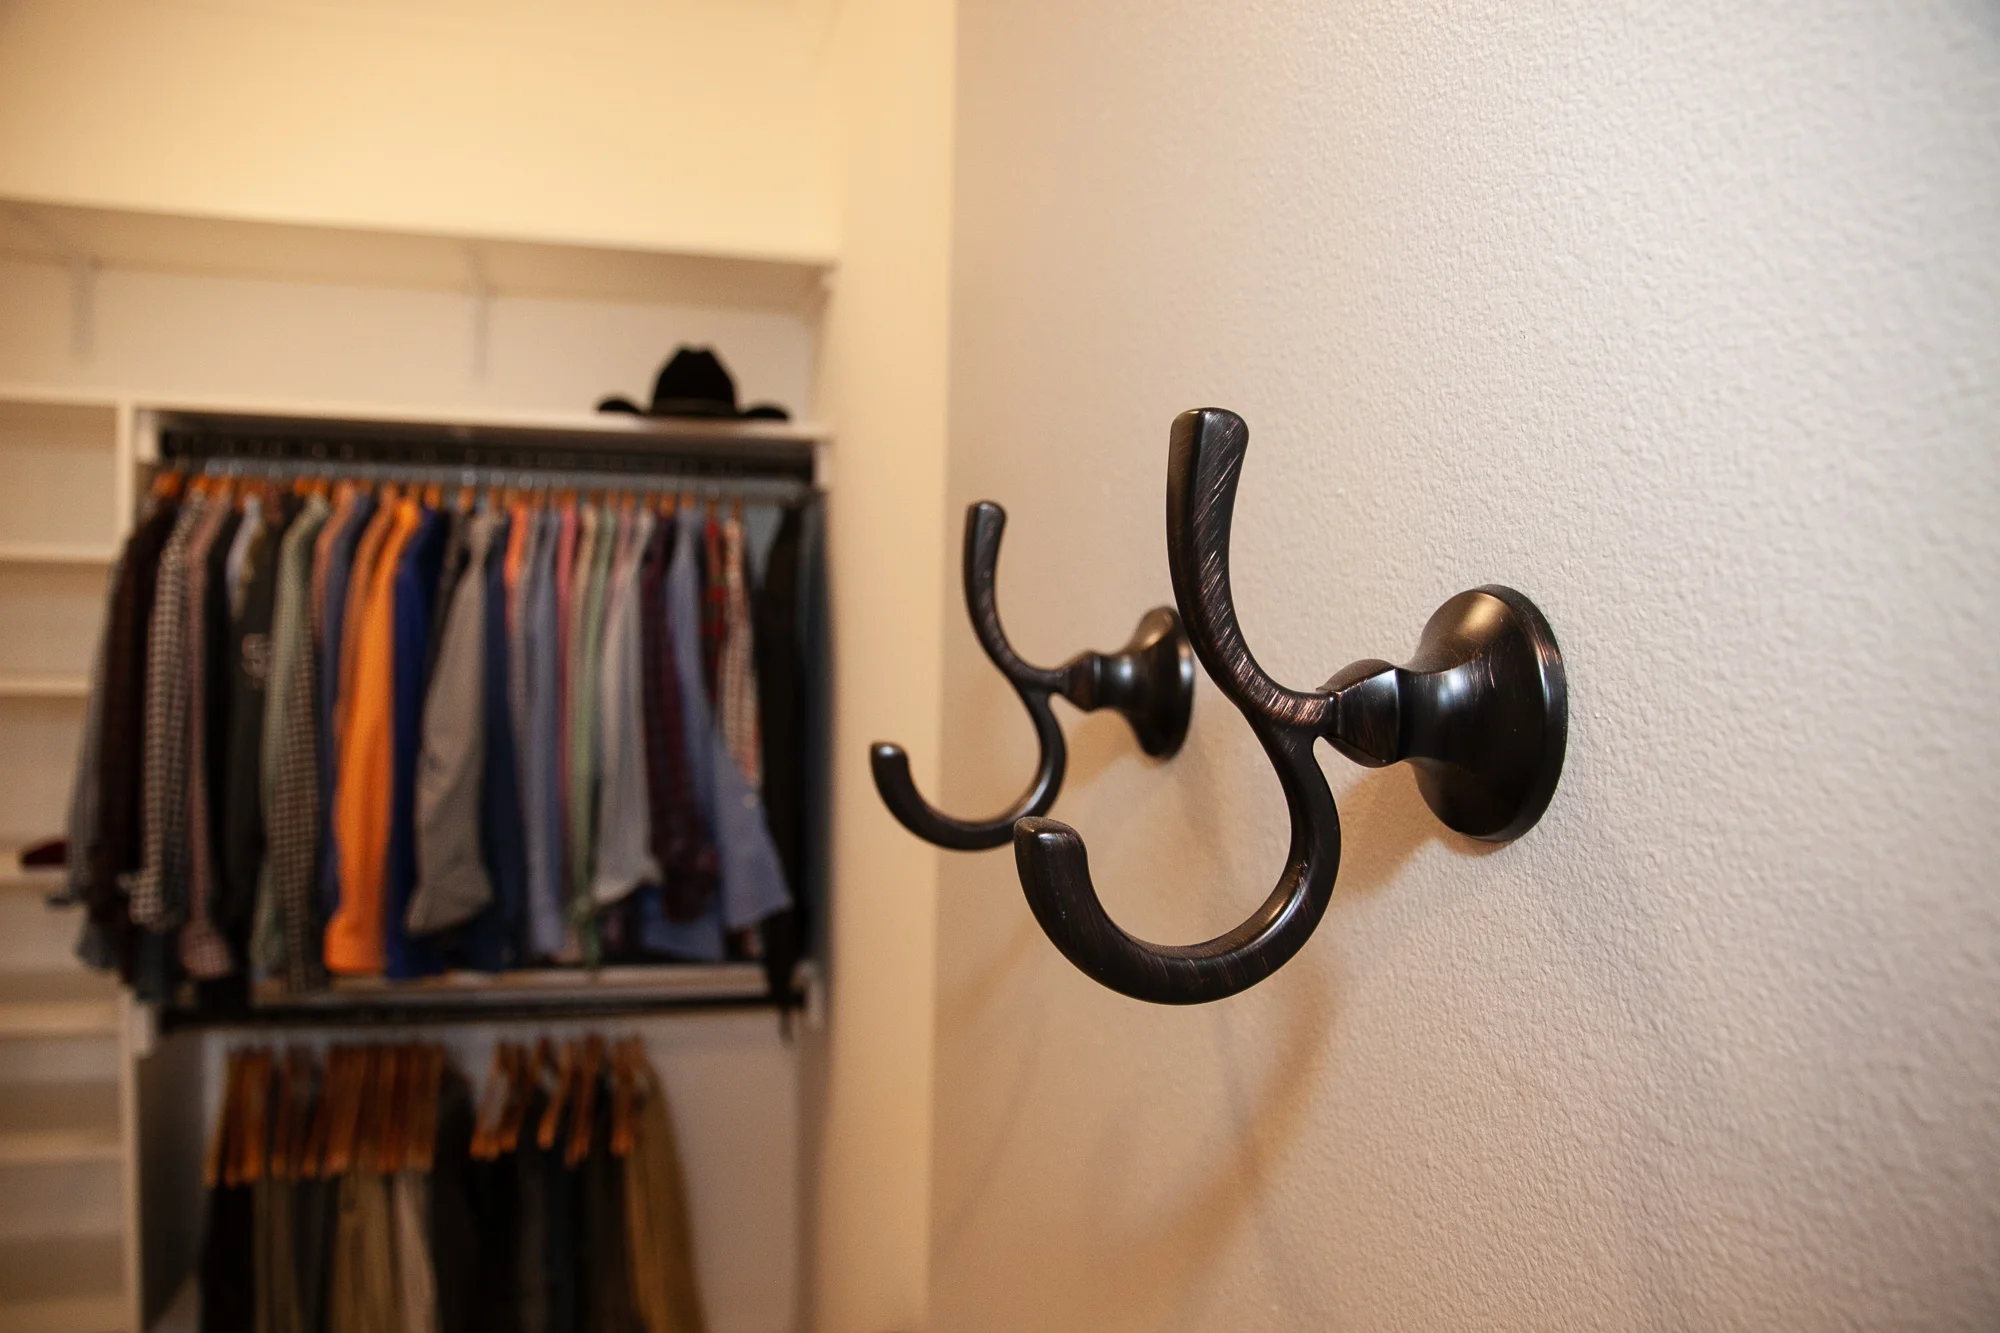
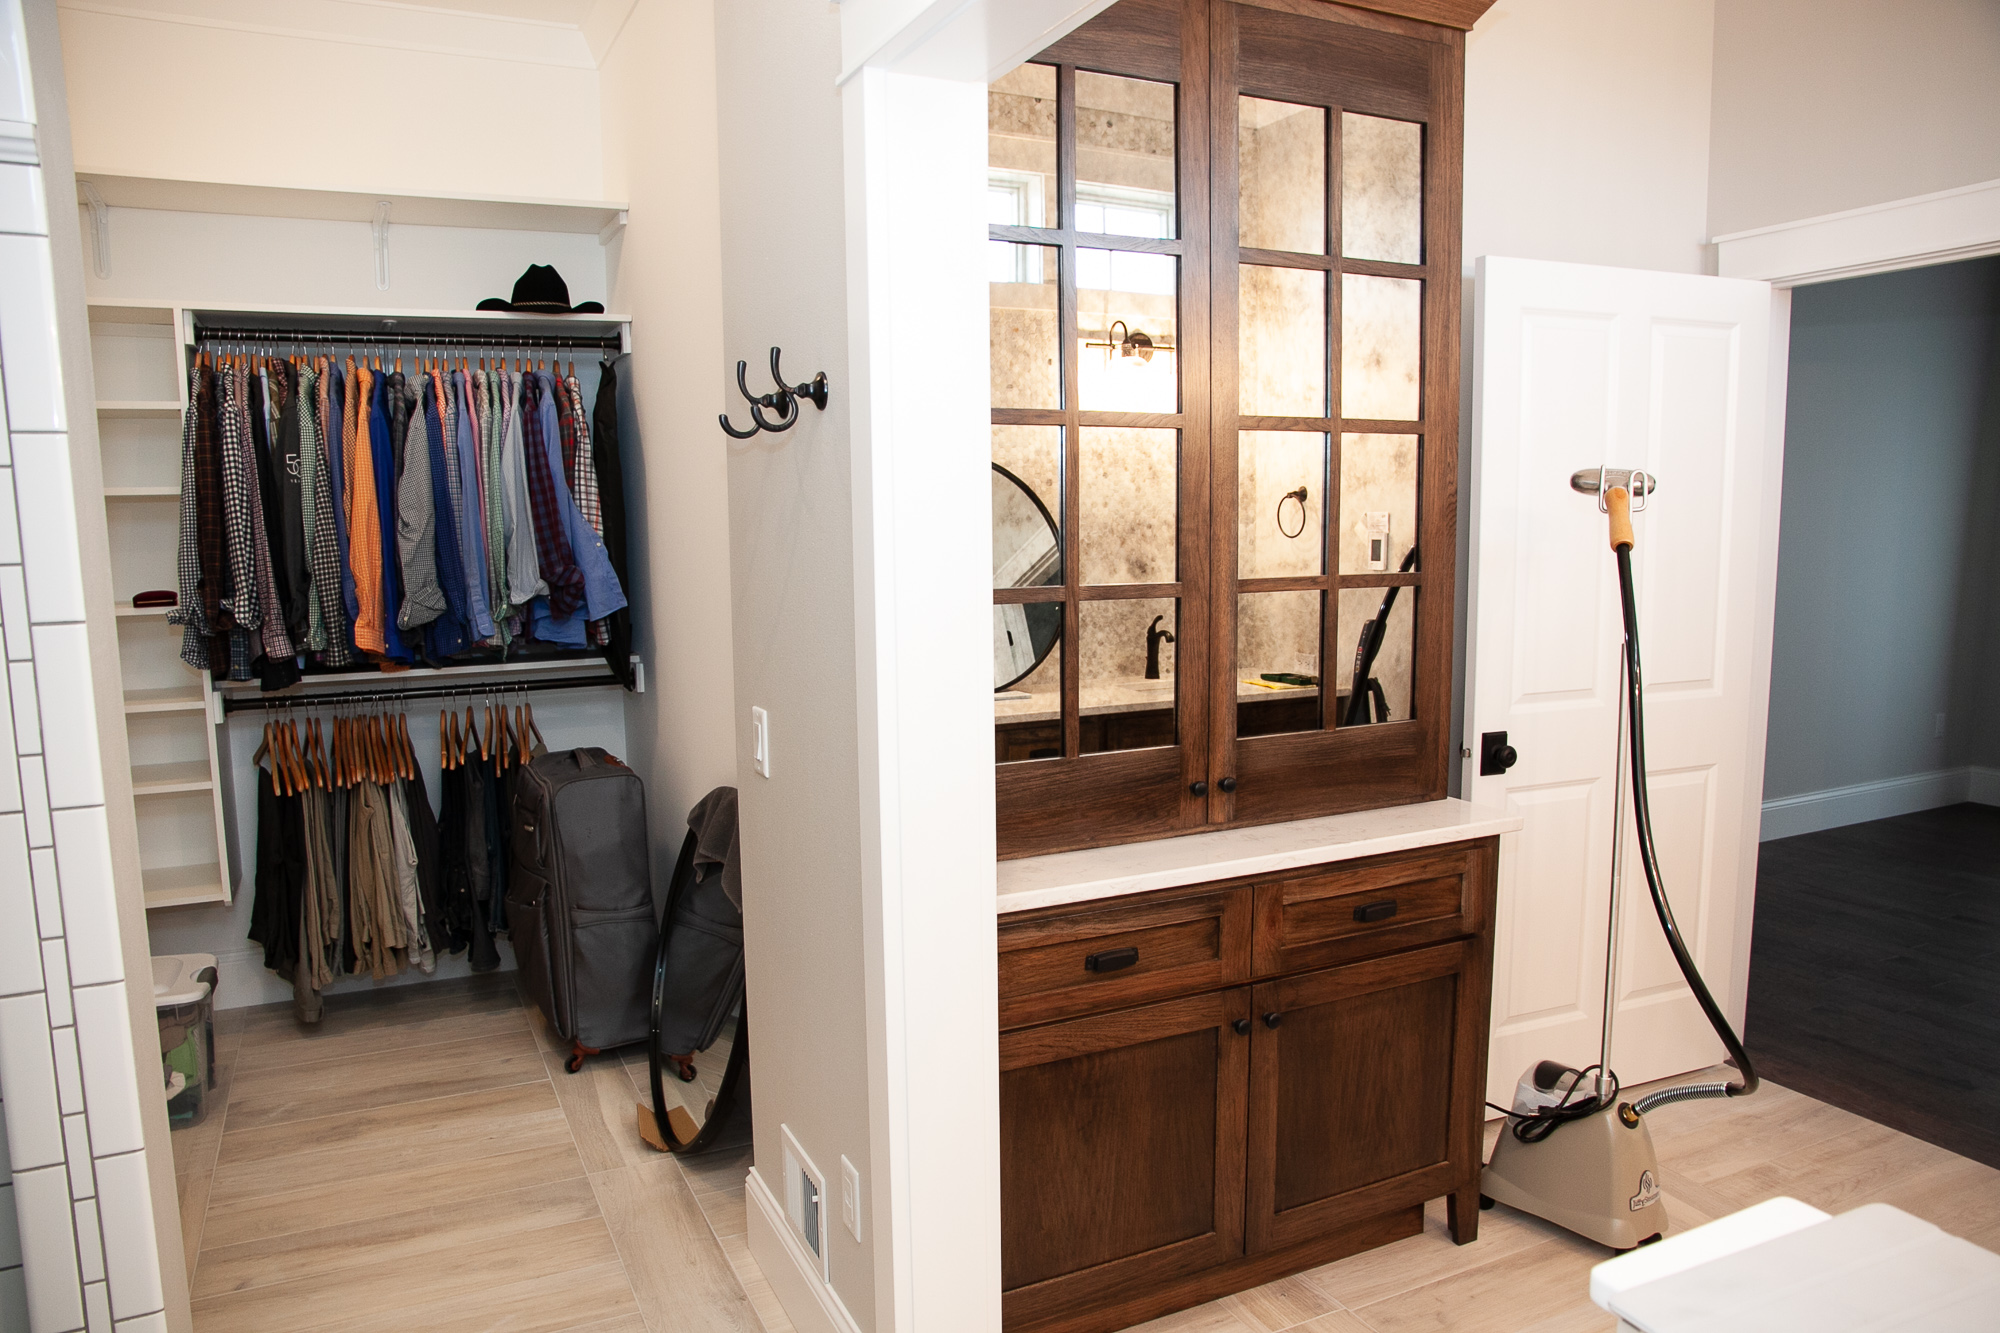
Coordinating the brass finishes in the various fixtures was tricky. The variety of options out there is extensive. There is brass finishes with orange tones and very yellow tones. There is matte brass and polished brass. Finding a style I loved in the right color and finish was a bit of a challenge.

My first pick was the light sconce from School House Electric. I enjoy the hand crafted classic look, the interesting Edison style bulb on display through the clear glass, and the adjustable arm.  I like them so much, I added two more on the staircase wall.

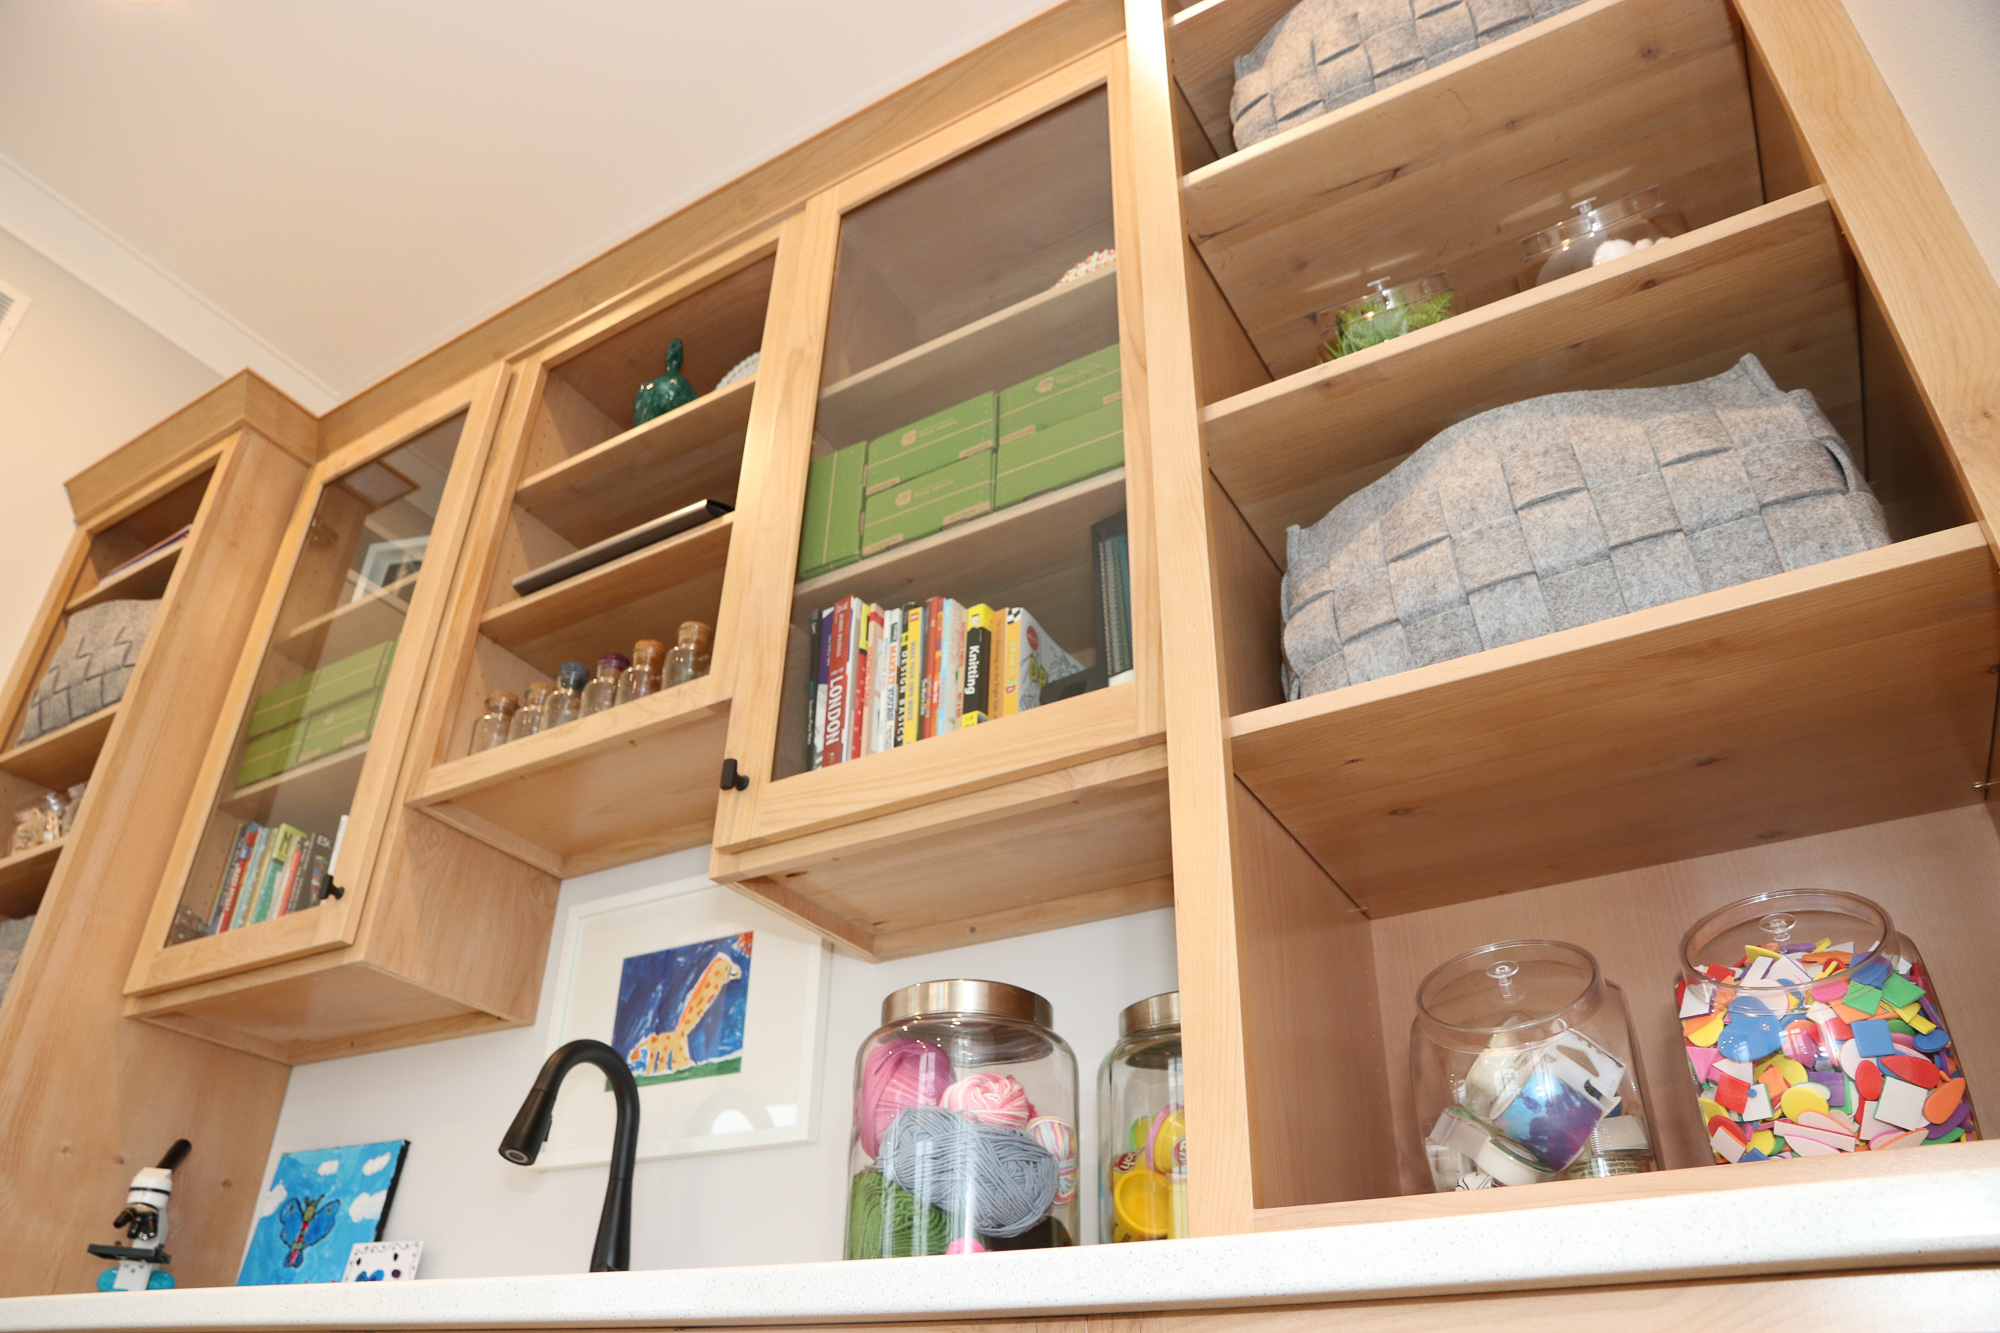
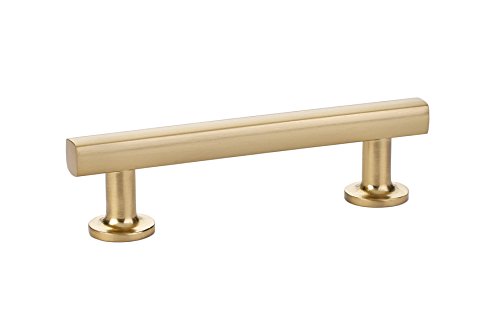
For the cabinet knobs and pulls, the size of the wall cabinet doors required something more substantial than a round knob but I dind't want to put a large pull on the doors. This linear knob style from Emtek is the perfect compromise. The drawer fronts, on the other hand, called for some long pulls. the shape of these coordinating pulls is simple yet substantial.

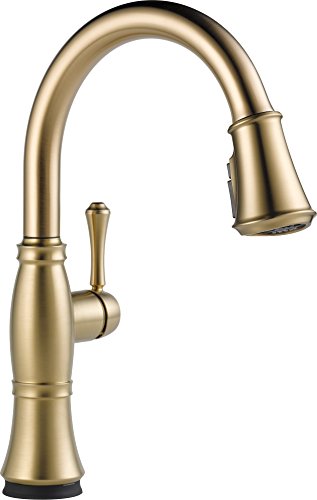
More practical considerations were needed when selecting the faucet. This faucet from Delta has the Touch2O technology allowing you to lightly tap the neck of the faucet for instant flow. I love how this keeps the water drips off of the countertop and the dirty hands off of the handle. The faucet has a few more curves than the sconce and pulls. I like how this will relate to some of the other elements in the room that aren't so modern. 

The brass finish available in this style was limited and although the shade of gold is a bit different on all three of these fixtures, the combination is working.


These brass fixtures are nice but including more accessories in brass will enhance the effect even more. Some decorative brass bowls are on display in the glass cabinets and another on the countertop. Lamps and other brass accessories will continue to be used in the dining room and family room.


Sometimes going back to a trend that I grew up with is hard but with brass, the style is so different and the mix of metals allows it to be interesting and not overpowering. I'm really excited about this "new" trend.


Here's a little more inspiration for gold finishes:
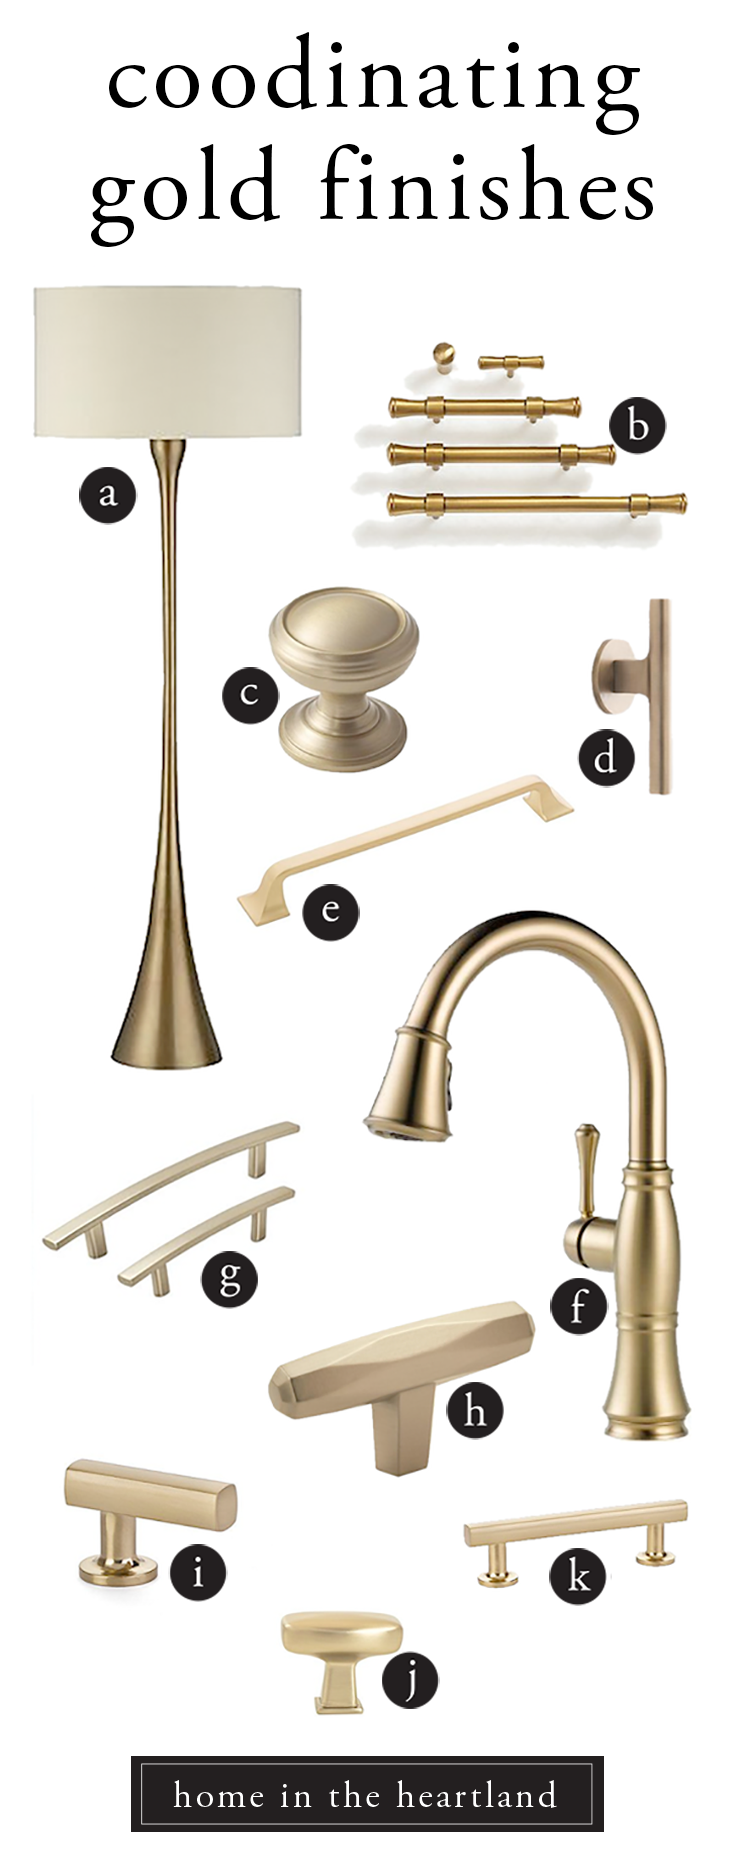
CoordinatingGoldFinishes.png

#23 Art Room

This room is magical! The views are some of the best in the house with five windows offering West and North views. There have been so many originals created in this room already - even from our visiting guest artists!


some design tips that make this room super functional:

Tip #1

The proximity to our living space makes it a go-to spot for our daughter. If this room was hidden in the basement or near our bedrooms, we're confident it wouldn't get the same daily use.

Sliding doors separates the living room and art room

Sliding doors separates the living room and art room


Tip #2

Drawers are the most efficient way to store most of the art supplies. You don't have to open a door and then pull something off a shelf. Just by pulling the drawer open, the items come to you for easy access.

The paint drawer

The paint drawer

IMG_0715.jpg
IMG_0713.jpg

Tip #3

Offer inspiration! We loaded the shelves with activity and art books that can be used for inspiration. We love to bring our ipad in to use pinterst too!

A shelf of idea books

A shelf of idea books

Some of our favorite art room books!


Tip #4

Store things in clear containers. Keep supplies as visible as possible. Use these glass jars and plastic candy jars to keep supplies organized and contained but also visible.

Glass jars are great for storage

Glass jars are great for storage

Some of our favorite art supplies!

home in the heartland art room containers.jpg
home in the heartland art room containers 2.jpg
"Candy Jars" are great for storage too!

"Candy Jars" are great for storage too!

Great storage containers!


Tip #5

Having a sink in the art room has already saved us from making endless trips to the kitchen. It's nice to keep the kitchen sink paint-free too! Add a large roll of paper towels and you're good to go. Clean up is easy-peasy!

A small sink for clean up

A small sink for clean up


Tip #6

Add comfortable seating. The casters make moving around easy. The warm fuzzy fabric is oh so comfy. And our daughter loves a swivel chair! We added this inexpensive rug to protect the wood floors from the casters (and from paint spills!)

IMG_0719.jpg
Two chairs and a large work surface

Two chairs and a large work surface


Tip #7

Add open shelves. Now that you have original artwork - it needs to be on display! The open shelves also offers space for work in progress or things that need to dry. Our shelves are looking a little more cluttered than we'd like but we'll put that on a our future project list.

We dedicated a lot of square footage and dollars to this room and we're so happy with the results. August loves this room and so do we! This morning we talked about what the next projects is going to be. She's thinking of making a gnome or Minon out of model magic. So much fun!

For more art room ideas, check out our Pintrest folder.

IMG_0692.jpg
IMG_0710.jpg
Open shelves for displaying projects

Open shelves for displaying projects

IMG_0712.jpg

And of course don't forget to add in some original artwork! (Posted earlier on Facebook)

36732350_469747986809532_7808868431008104448_o.jpg

Follow our art room board

I started a Pintrest board for the art room, make sure to visit it and get inspired!

Moving Day!

Whew... moving is hard work! We're getting more settled as the days go by and LOVING our new digs!

Construction-Line.png

Construction is behind schedule so the contractors worked hard to get us a temporary occupancy permit. We sold our previous home and we needed to move! There is still some interior work to be done and lots of exterior work to be done. We appreciate not having to move to a temporary home though.

Here's a gallery of pictures taken by Liz Schaefer just as we're starting to move our things in.

A special thank you to all of our heavy lifters and packers - you guys rocked! 

We can't wait to share more pictures of our home after each room is completed. Our daughter settled right into the art room. It has one of the best views in the home!

#21 Master Bathroom Tiles

DUAL TILE LOOKS

The grout you pick can be almost as important as the tile you select. Look below at how different this marble tile looks with a dark grey grout verses a bright white grout.

DualTile.png

Angie shows the different looks applied in the video below.


MORE BATHROOM DETAILS

The edges of the tile require special finishing. That finished edge can be achieved with metals, accent tiles, or bullnose. Bullnose is using the same tile but having one of the edges rounded and finished. You can see that detail in the photos below.

IMG_4422.JPG

In addition to the edges, the transition between the white ceramic tile and the marble hexagon tile was addressed with this interesting molding. This change in dimension adds interest like a chair rail would in a decorative wood treatment on your wall.

IMG_4419.JPG

A recessed shelf will store the shampoo, soap, etc without taking any additional room in the shower. Using the space between the studs is an efficient use of space. Just remember, these need to be on inside walls.


Construction-Line.png

The masons are doing their thing and it is beautiful! We wanted a style that felt a bit aged and old. The stones are mostly warm gold tones with some grey mixed in. The way this stone frames the circle window is magical.

See those white beams? They will be cedar next time you see them. A bit of a miscommunication but the builder is on it. Our intention is to have the columns match the garage doors. It will be a bit more maintenance for us, but it will be worth it to get the warmth of the stained wood in the mix.

IMG_4478.JPG

The painter is working hard to get the nail holes filled and a crisp white edge on the crown molding. His attention to detail is like no other. We appreciate it so much!

IMG_4535.JPG

#20 Exterior Details

We're getting down to adding the final details to the exterior. One of the many decisions we need to make yet involves the flower boxes planned for under the windows. Should the color be black or brown?

My designer instincts are leaning me towards repeating the brown from the garage doors in order to create balance. We are considering black as well because of the continuity it would have with the shutters. The brown can be brought in with a fence or landscape. We had some images made of the options to confirm.

A view of the final selections

A view of the final selections

And the winner is...

After looking things over, we decided to stick with the brown. We really like how the brown adds warmth to the white and black. It also adds a touch of rustic which we like very much. we can't wait to see that pink wall by the front door turn to stone in the next week or two.

FlowerBoxes.jpg

Are you following us on Instagram?

If you're on Instagram, make sure you follow along on our journey! We're making some serious progress on the house and posting lots of new photos!

#19 Recessed Lighting

Recessed cans that aren’t recessed? Confusing statement? Yes, it is!

One of our goals in the basement was to have as unobstructed of a ceiling line as possible. Giving us the full range of our walls. It worked out extremely well because the heat runs and returns could all fit between the joist space with no extra soffit needed. Whew!

Angie meticulously mapped out the perfect location for all of lighting downstairs, careful to space out each can appropriately to give optimal coverage for their glowing magnificence.  We planned for 8 in the living room spaced out symmetrically, 6 in the playroom, 4 in the workout room. It was going to be perfect.

And then… the electrical walk through. Almost everything upstairs went according to plan and then we walked to the basement. Our faithful electrician dashed our dreams and resurrected them all at once. “You know that you can’t use cans in basically any of the spots that you want to put lights because of the HVAC, right?  However, you can use these newer fixtures that are available.” Do tell.

After some explanation from the electrician, we were able to find these little beauties.

  • They can go anywhere a fixture goes!

  • They only hang down ¾” off the ceiling and gave us the ability to put our “not recessed” cans wherever we wanted to!

  • Let their LED light shine!

We even bought enough of them to use in the storage area in the unfinished part of the basement because we liked them so much.

z. basement lights.jpg

We ended up using this product for the “true” recessed can lights upstairs.

  • They fit into the can itself

  • Remain flush at the surface with a trim kit to cover the opening

However, the other style also has a retrofit kit included so you can use it in your existing can lights.

z. upstairs lights.jpg

We love the way they look and we're looking forward to the longevity of these fixtures. Let them shine for 35 years plus!